Window Tiling
Basic Window Tiling
The Cinnamon desktop environment includes basic window tiling:
- Press
Super + Leftto make the active window tile to the left half of the screen. - Press
Super + Rightto make the active window tile to the right half of the screen. - Press
Super + Upto make the active window tile to the top half of the screen. - Press
Super + Downto make the active window tile to the bottom half of the screen. - You can tile to a corner by combining these options. For example, to tile to the upper right corner, hold the
Superkey and then press the Up arrow and then the Right arrow. - Cinnamon's basic window tiling has no window gaps so it maximizes your screen area and is especially helpful when working on smaller screens like laptops.
Advanced Window Tiling
For more advanced window tiling options, we've included a custom version of the gTile extension:
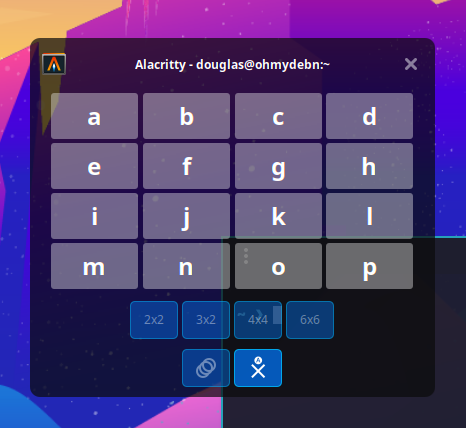
- Pressing
Ctrl-Shift-Gwill display the gTile overlay and give you several options for tiling the active window. - The default grid options are 2x2, 3x2, 4x4, or 6x6. You can select a different grid option with the mouse or by pressing
1,2,3, or4. You can modify these default grid options by going to the gTile extension settings. - Select the starting tile by pressing the letter associated with that tile and then select the ending tile by pressing the letter associated with that tile. For example, to tile the window to the left half of the screen in a 4x4 grid, press
aand thenn. - To set the window to a single tile, press the letter twice. For example, to tile to the upper left corner, press
atwice.
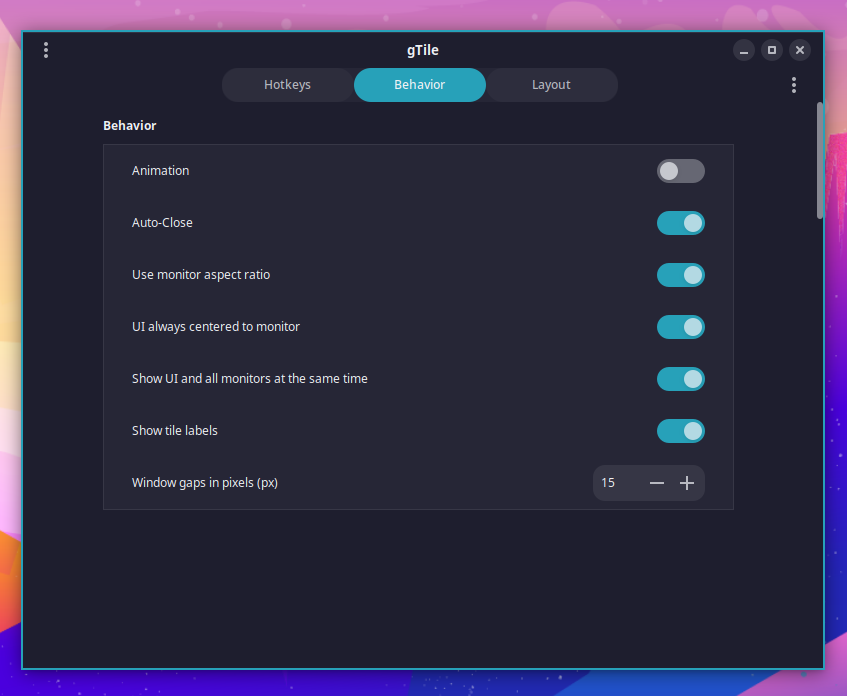
To configure gTile:
- go to System Settings -> Extensions
- next to gTile, click the Configure button
- click the Behavior tab
There are also hotkeys for common tiling options that leverage gTile for window gaps:
- Press
Ctrl + Shift + 1 (numeric keypad)to tile to bottom left corner with gaps. - Press
Ctrl + Shift + 2 (numeric keypad)orCtrl + Shift + Downto tile to bottom half with gaps. - Press
Ctrl + Shift + 3 (numeric keypad)to tile to bottom right corner with gaps. - Press
Ctrl + Shift + 4 (numeric keypad)orCtrl + Shift + Hto tile to left half with gaps. - Press
Ctrl + Shift + 5 (numeric keypad)orCtrl + Shift + Enterto tile to full screen with gaps. - Press
Ctrl + Shift + 6 (numeric keypad)orCtrl + Shift + Lto tile to right half with gaps. - Press
Ctrl + Shift + 7 (numeric keypad)to tile to top left corner with gaps. - Press
Ctrl + Shift + 8 (numeric keypad)orCtrl + Shift + Upto tile to top half with gaps. - Press
Ctrl + Shift + 9 (numeric keypad)to tile to top right corner with gaps.
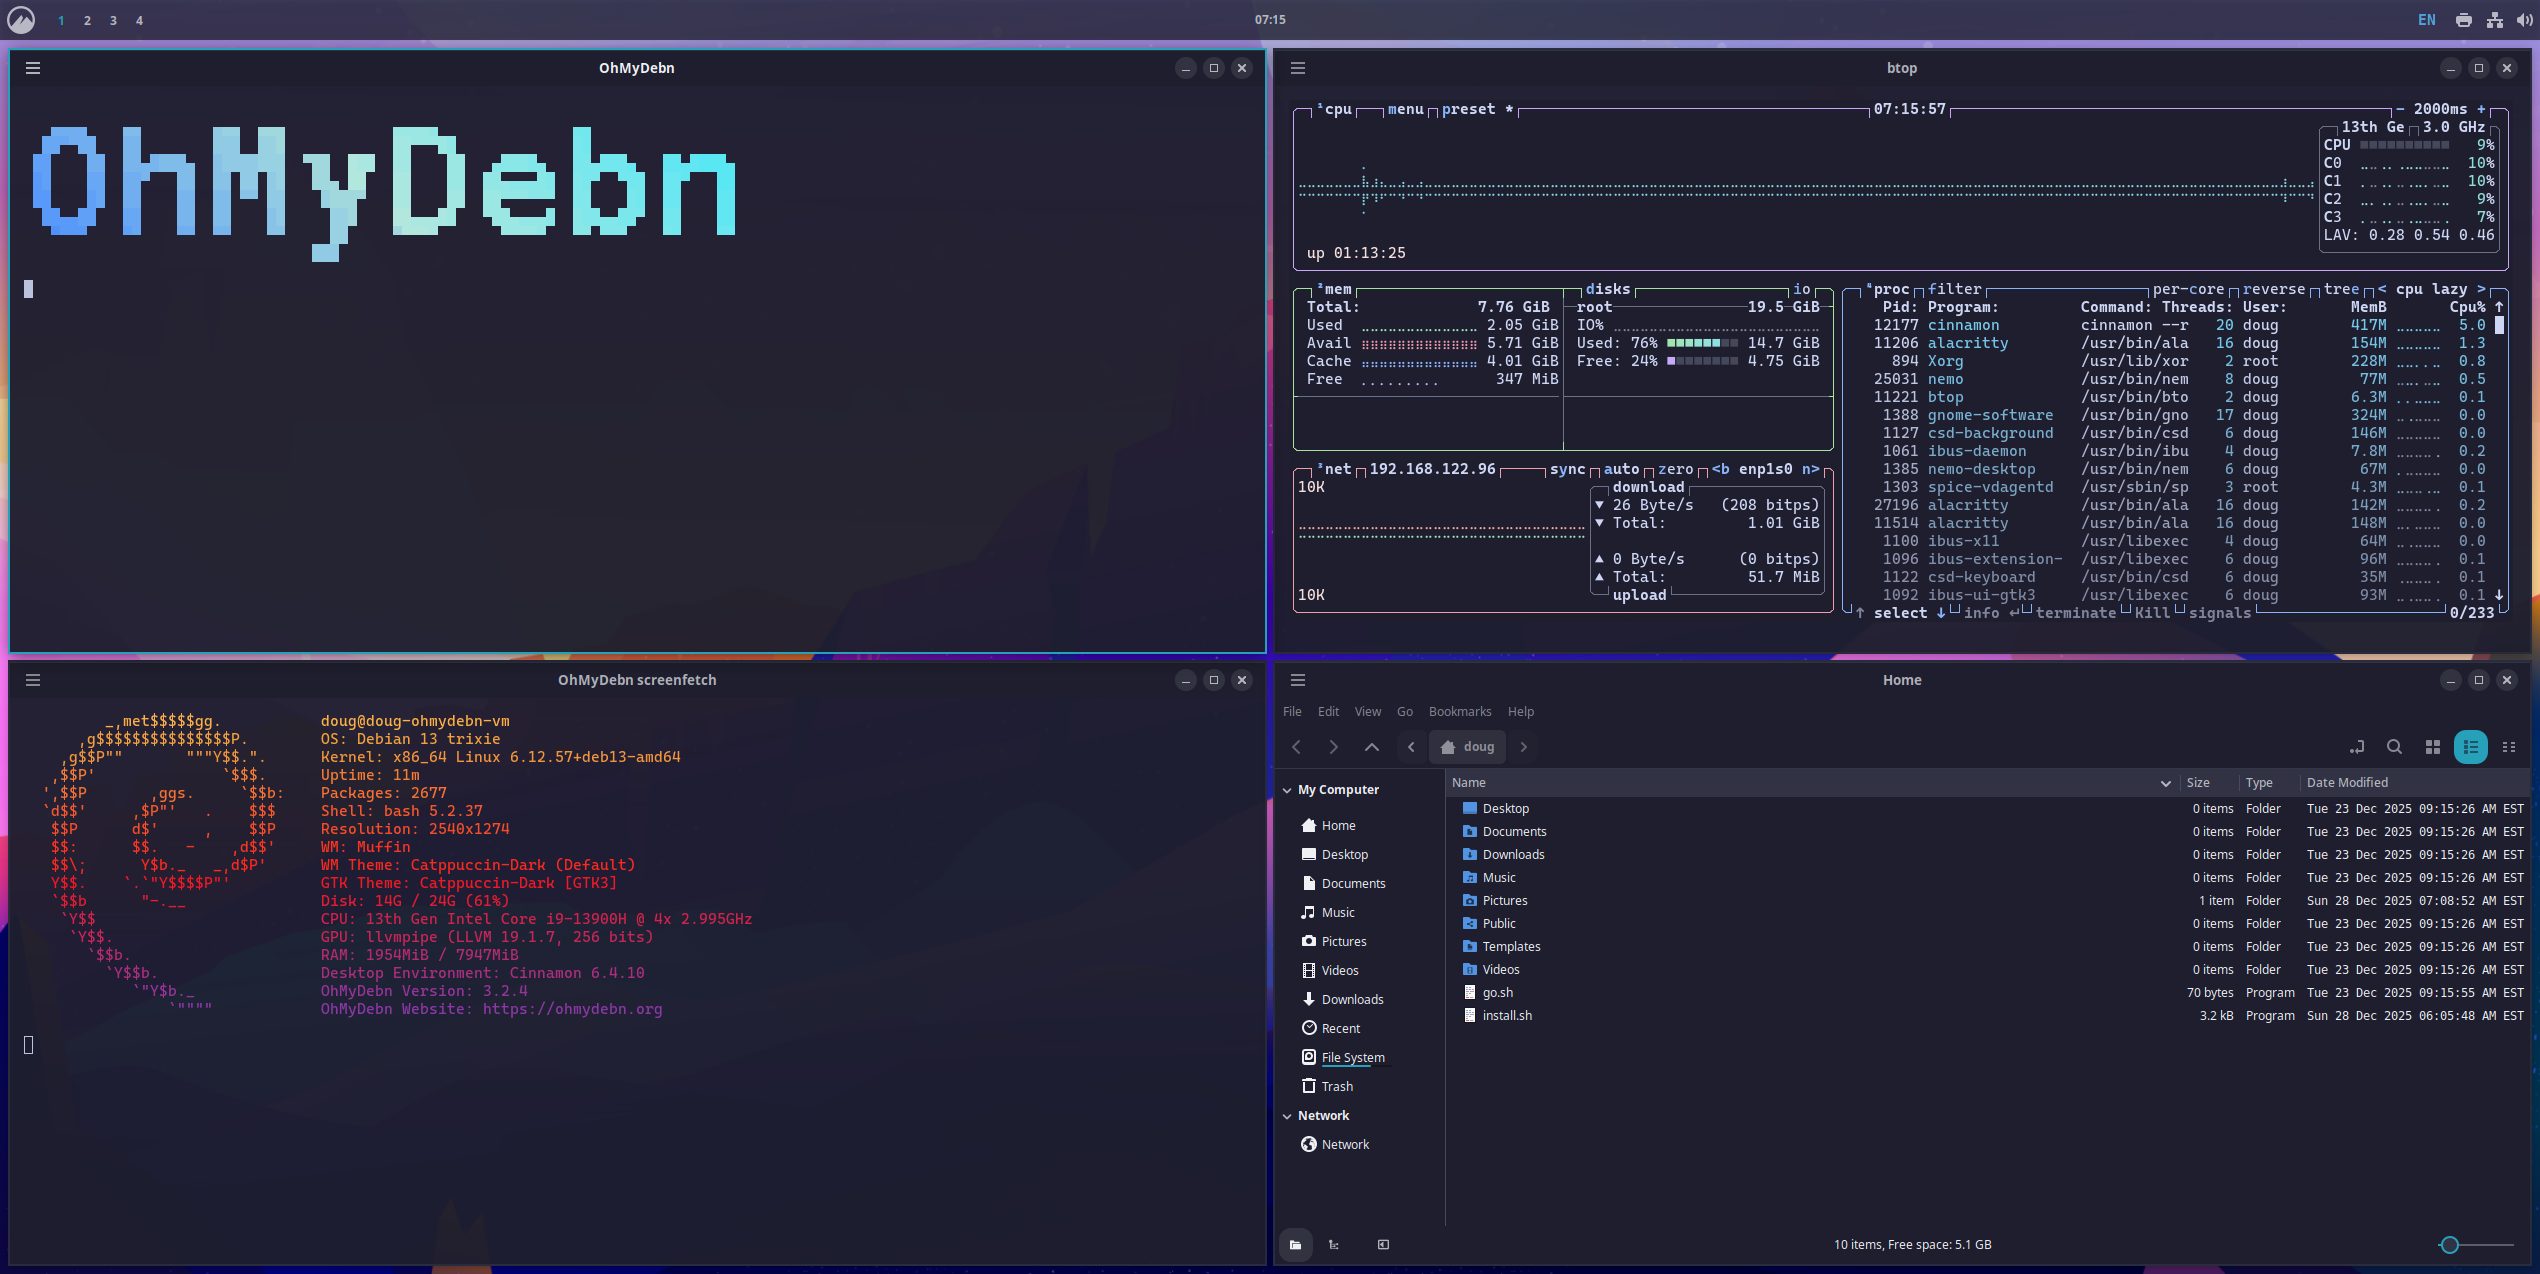
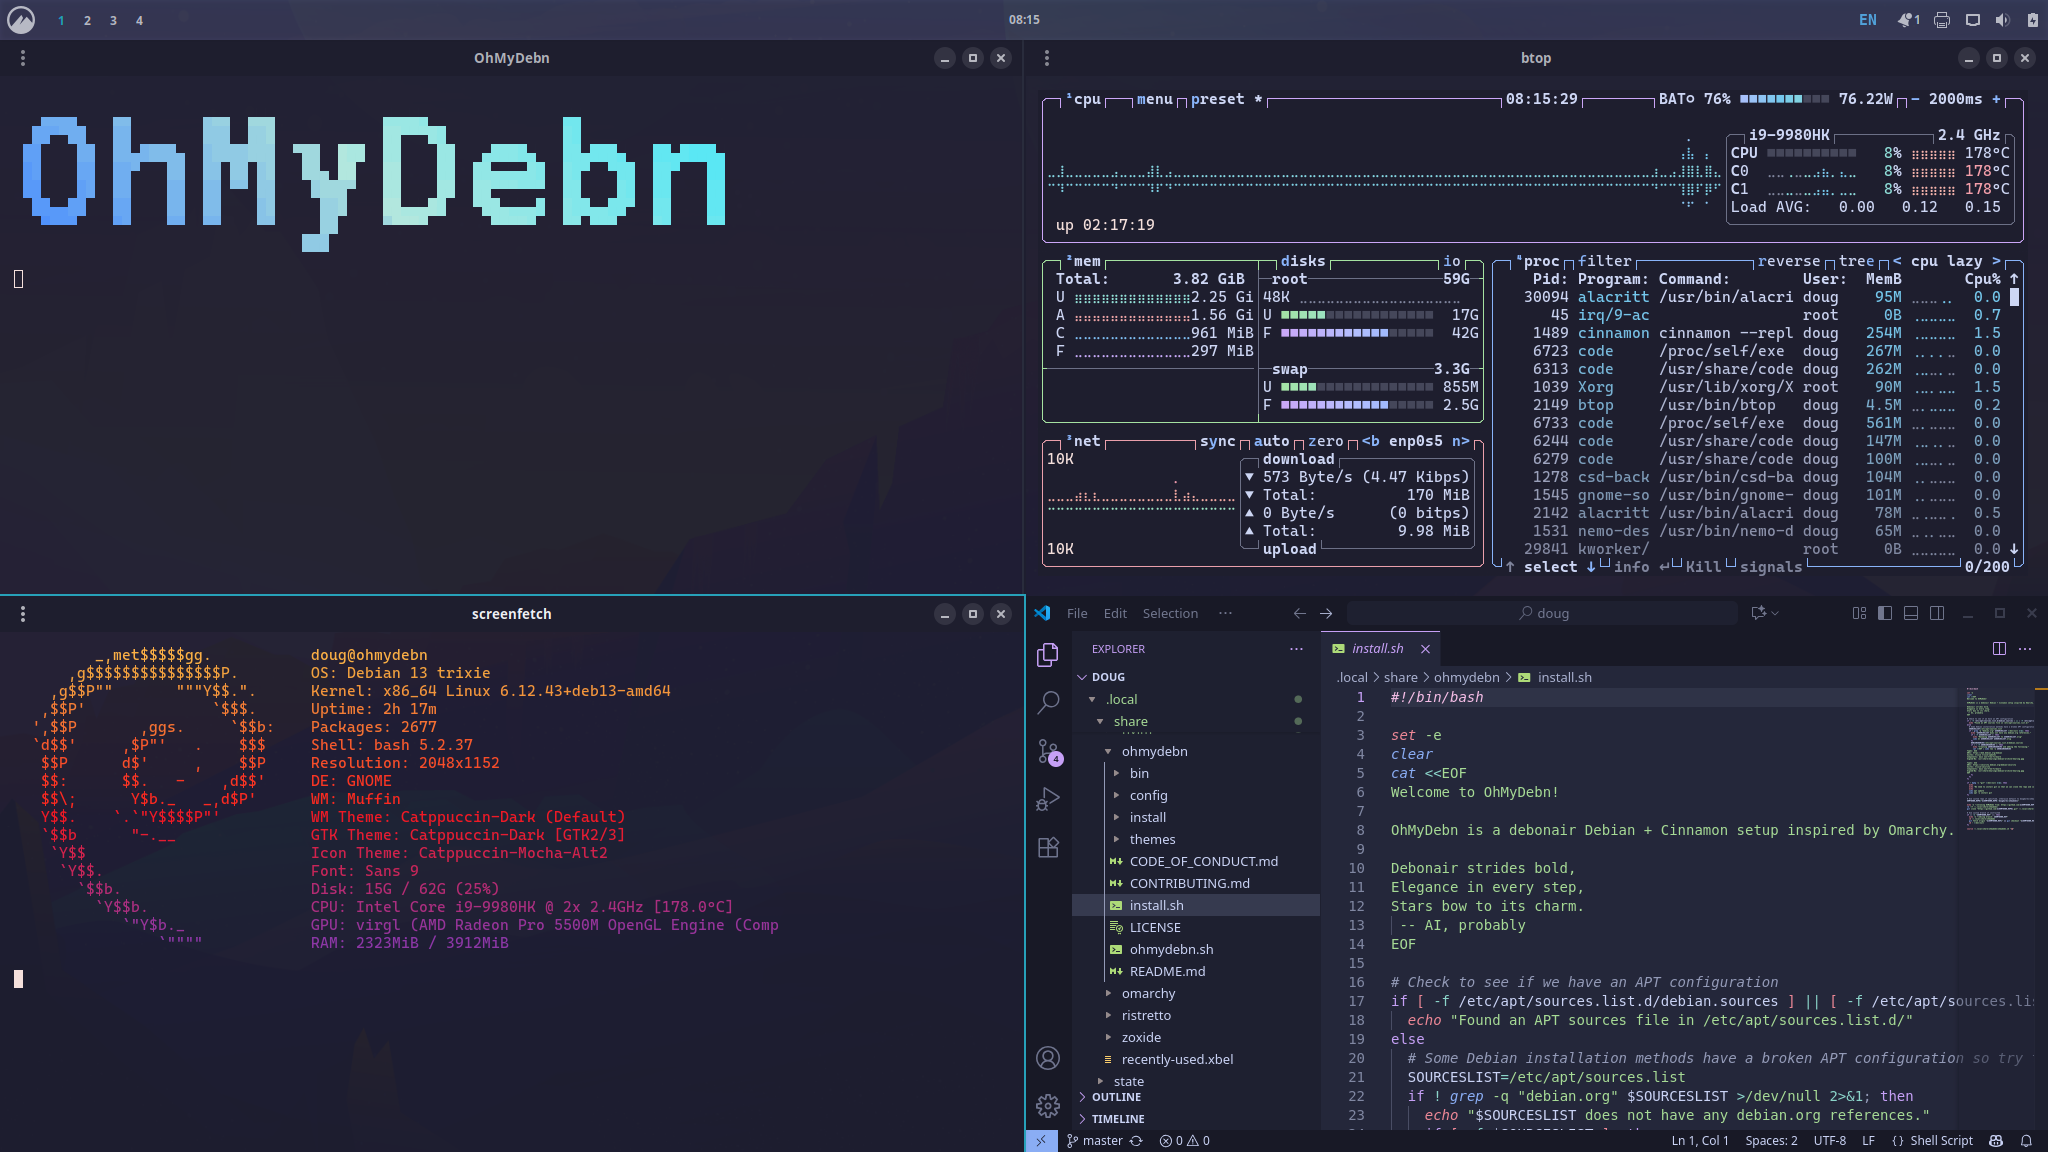
For example, to lay out windows like in the following screenshot:
- Press
Ctrl + Shift + Oto display the OhMyDebn logo and thenCtrl + Shift + 7to tile to the upper left corner. - Press
Ctrl + Shift + Sto display the screenfetch window and thenCtrl + Shift + 1to tile to the lower left corner. - Press
Super + Tto start btop and thenCtrl + Shift + 9to tile to the upper right corner. - Press
Super + Fto start the file manager and then pressCtrl + Shift + 3to tile to the lower right corner.